
Smooth paintwork starts before you open the tin. Good sand jet preparation involves cleaning the surface, filling larger imperfections, sanding rough areas and removing dust before painting. The surface should be sound and dry before the first coat. Skipping these steps can leave blemishes visible beneath the finish or make coverage uneven.
It’s easy to focus on colour and the final look, but careful preparation gives paint a consistent surface to adhere to. This guide explains how to assess and prepare different surfaces, when filling, sanding or priming may be needed, and how to apply coats evenly. It also covers when cleaning calls for more than a routine wipe-down, so you can choose a practical approach before work begins.
Key Takeaways
- Assess the surface first, then clean it and deal with loose material, cracks and larger imperfections before painting.
- Choose sanding and priming steps to suit the surface, and remove dust so it doesn’t affect the finish.
- Apply paint in even coats with a consistent technique, allowing each coat to dry as directed before adding the next.
- For extensive or difficult brick and stone preparation, specialist cleaning and surface preparation can help create a suitable base for painting.
Preparing surfaces before painting
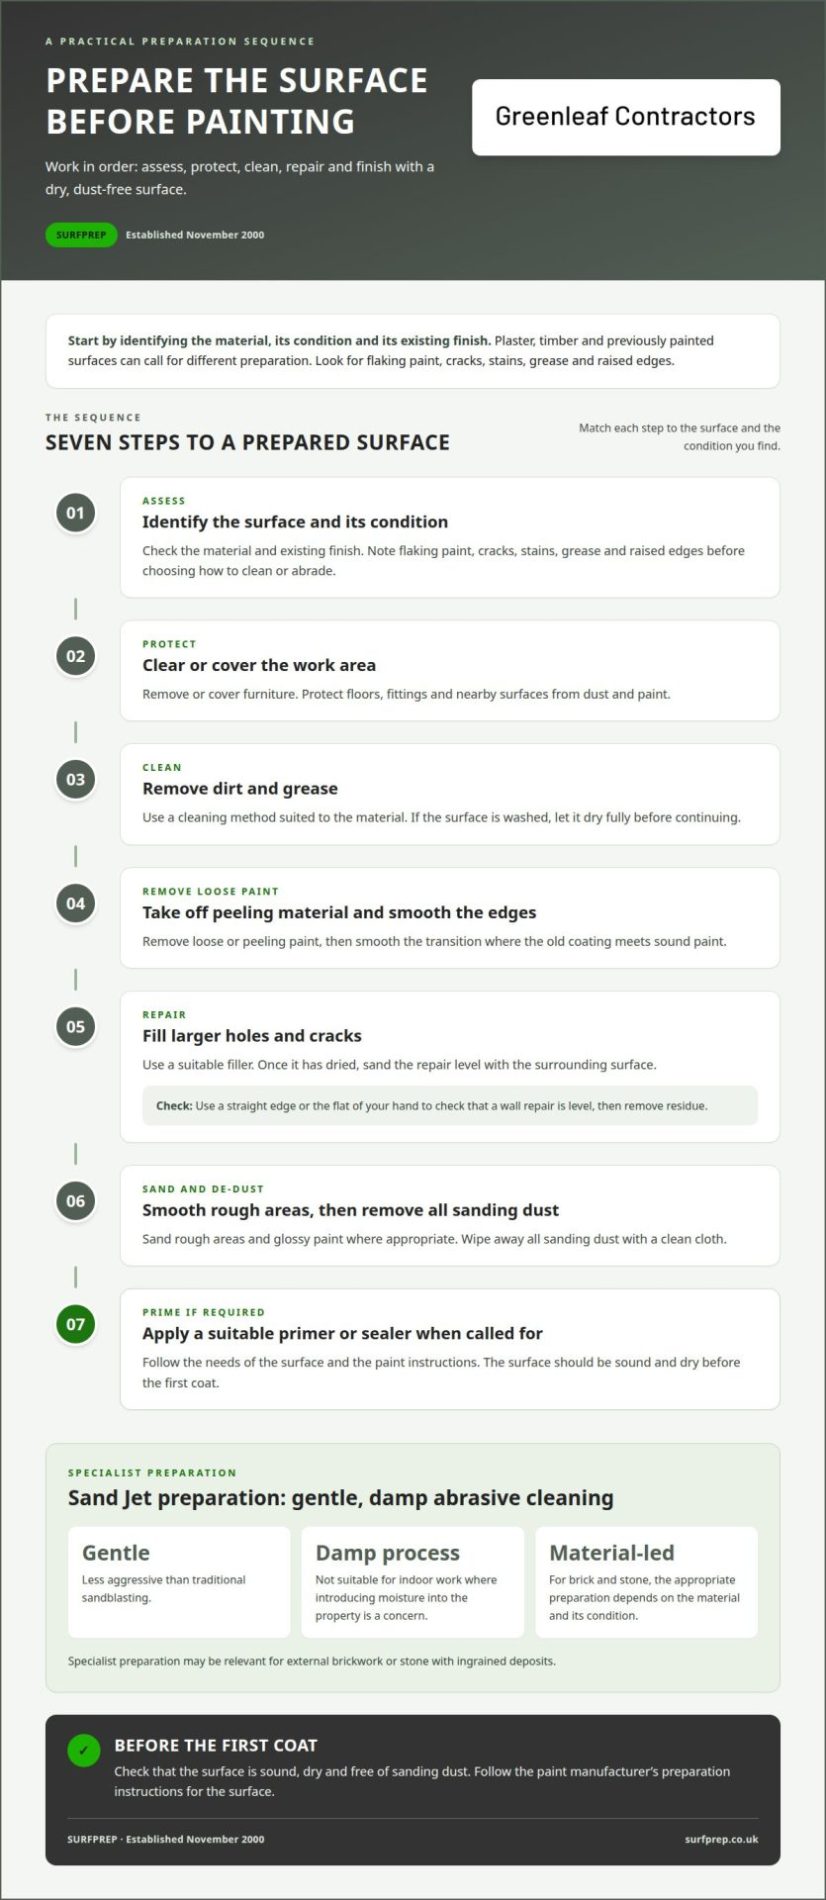
Effective sand jet preparation starts with identifying the surface, its condition and any existing finish. A plastered wall, timber panel and previously painted door need different preparation, so inspect each area before choosing how to clean or abrade it. Look for flaking paint, cracks, stains, grease and raised edges, which can affect adhesion or remain visible through the new finish.
Work through the surface in a practical order:
- Remove furniture or cover it, then protect floors, fittings and nearby surfaces from dust and paint.
- Clean away dirt and grease using a suitable method for the material. Let any washed surface dry fully before continuing.
- Remove loose or peeling paint, then smooth the edges where old coating meets sound paint.
- Fill larger holes and cracks with a suitable filler. Once it has dried, sand it level with the surrounding surface.
- Sand rough areas and glossy paint where appropriate, then remove all sanding dust with a clean cloth.
- Apply a suitable primer or sealer where the surface or paint instructions call for one.
For example, a filled patch on a wall can stand out if it is still raised or dusty. Use a straight edge or the flat of your hand to check whether the repair is level, then remove residue before painting. On timber, look for rough grain and damaged edges. Sanding can create a more even base, but it won’t repair loose or deteriorated material. Follow the paint manufacturer’s preparation instructions for the surface.
Common mistakes include painting over dust, leaving grease in place, skipping repairs and sanding only the centre of a patch. Each can create a visible difference in texture or sheen. Starting before a cleaned or filled area has dried can also affect the finish. Preparation is more than extra work: matching each step to the defect makes it more effective and gives the coating a consistent base.
An independent preparatory school is a useful example of planning around a building’s use. Before painting a classroom, identify desks, displays and fittings that need protection, and prepare each wall section before moving on. A rushed job that leaves dust around sockets or filler ridges beneath the paint can stand out when the room is back in use. Keep the sequence clear: protect, clean, repair, sand, remove dust, then prime where required.
Coats and application technique
Once the prepared surface is dry, follow the instructions on the paint tin. They specify the recommended number of coats, drying time and application guidance for that product. Don’t assume every wall needs the same coating schedule. A strong colour change, a marked surface or a different base colour can affect how evenly the finish develops.
Before starting, stir the paint thoroughly so its colour and consistency are even. Pour a manageable amount into a clean tray or kettle, then close the tin to limit contamination and drying. Use a brush for corners, edges and narrow details; a roller covers broad, flat areas more efficiently. Choose tools suited to the surface and paint instructions rather than using one tool for every detail.
For a wall, work in sections you can complete while the paint remains workable. Apply it in a consistent direction, then lightly even out the area without pressing hard. Keep a wet edge by overlapping each new pass with the previous one. This helps reduce visible joins, especially where daylight falls across a large wall. Don’t keep brushing paint that has started to tack, as repeated strokes can disturb the finish.
- Cut in around one manageable area, such as a ceiling edge or window frame.
- Load the roller evenly, removing excess paint from the tray’s ridged section.
- Cover the nearby wall with steady, overlapping passes, keeping pressure consistent.
- Check the surface from different angles for missed patches, drips or heavy edges.
- Let the coat dry for the time stated on the tin before applying another.
Between coats, assess the finish in good light. A thin patch beside a door frame may need attention, while a drip can leave a raised mark if you simply paint over it. Let the coat dry first, then smooth the defect carefully and remove residue before continuing. Avoid rushing the next coat: paint that feels dry at the surface may still need the full drying period stated on the tin.
Apply the next coat with the same tools and a consistent method. Keep the room’s airflow and temperature within the paint maker’s instructions, since conditions can affect drying. Don’t dilute paint or stretch it beyond the stated coverage. Judge progress across the complete surface rather than by a small wet patch, as drying can change how the colour and sheen appear.
Surfprep: Industrial Surface Preparation
Established in November 2000, Surfprep provides industrial surface preparation when large or difficult areas need more than routine cleaning before a coating can be applied. This can be relevant to external brickwork or stone, where ingrained deposits may affect the surface. The appropriate preparation depends on the material and its condition, not simply the finish you want.
Surfprep provides Farrow System support, including gentle abrasive cleaning with a Sand Jet, a damp process that is less aggressive than traditional sandblasting. Because it introduces water, it is not suitable for indoor work where moisture in the property is a concern. Brick and stone also need a method suited to their condition and surface.
If a substantial surface needs specialist preparation before painting, contact Surfprep to discuss the work.
Plan the next step for your surface
Once you’ve settled on the paint and finish, consider whether the surface itself needs specialist attention before work begins. Careful sand jet preparation can involve more than routine decorating where building materials carry stubborn deposits, weathering or an uneven existing finish. The right approach depends on the material and its condition, particularly across larger or more complex areas.
Surfprep’s work includes brick cleaning, stone cleaning and wooden beam cleaning, alongside industrial surface preparation. These services can help address surface issues that ordinary paint preparation doesn’t resolve, so the coating process can start with a better-prepared base. If your project involves a challenging surface, contact Surfprep about paint preparation and discuss the next practical step. A clear plan for the surface makes it easier to move ahead with confidence.
Frequently Asked Questions
What is Sand Jet Preparation?
Here, sand jet preparation means preparing a surface for smooth, even paint coverage, rather than referring to a separate paint or preparation product. The work depends on the material and its condition: a previously painted door, for example, may need different treatment from a plaster wall. This meaning is also distinct from Farrow System, the name associated with Sand Jet equipment.
